From Stephen Taylor at http://www.stephensdrumshed.com comes some really great advice about tuning a drum.
I put this out a few year's ago but a lot of drummer's haven't seen it. It's how to tune a drum on the fly.
I use this technique all of the time on my gigs. Can't tell you how many times it has saved my butt!
I’ve seen plenty of info on how to tune a drum. There are whole books out on the subject…what order the lugs should go in, top head higher or bottom head higher, how to properly seed the head onto the rim, so forth and so on. All of this is important, and informational, and educational, and whatever.
Here’s the problem…sometimes I don’t have time to calibrate each lug to be the exact tension of every other lug on the drum or to tune the toms a major third apart. The reality is that in a live setting you often will not have time to get your “perfect” drum sound, but you do need to know the steps for getting an acceptable drum sound. It doesn’t have to be perfect, but at least it won’t sound like you’re hitting a three inch thick piece of cardboard. No one ever told me that you would be put in situations where you would need to be able to tune a kit in under 2 or 3 minutes.
I originally posted this years ago on my blog. It has been so popular that I decided to revise it a bit for you. Let me set the stage for you…
You arrive late to the outside festival the artist your backing is booked to play. There are 6,431 bands that have to play in an eight hour span of time on the same stage. Your group will be group # 2,346. The backline has been provided (i.e. there’s a drumset already there, you just need to bring your sticks, snare, and cymbals.) and you’ve been given 15 minutes to shove the other band off of the stage, make adjustments to the kit, and count the band off. In that time you will also have to deal with a sound man who currently hates his life and is on a mission to make your day just as miserable as his. Only problem, the kit sounds like a dog turd in a dryer….no, worse than that. The kit sounds so bad that your guitar player is over in the corner vomiting in his mouth a little each time you hit a tom. To confound the issue, they’ve got Beyonce blaring in the system to entertain the masses while the band switch is taking place so you can’t hear a thing. This is a daunting situation. Even if the drum set sounded pristine, it would still be a stressful set change.
In this situation you don’t need to guess at getting a good sound out of the toms. You need a step-by-step guide for getting an acceptable sound out of them. I’m gonna do my best to provide you with just that. This has saved me countless times…
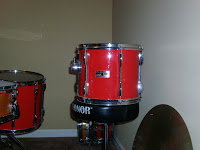
Step 1: Take the tom off of the tom mount and place it with one head resting on the seat of the drum throne or on your knee.
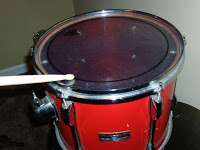
Step 2: You need to have a general sonic range that you want the tom to be in (if you’re playing a jazz set you may want the toms high with great attack…a rock set, you may want them lower and boomy, etc.). We’ll now choose a primary lug. This will be the sound that all of the other lugs will need to match. Pick the lug closest to you, place your ear about two inches away from it, and tap that lug about half an inch away from the rim while simultaneously muffling the bottom head with the throne or your knee so that you get only the sound from one head. Do this quickly with several of the lugs until you find one that is close to where you’d like the tom to sound. If there isn’t one that’s acceptable, quickly tighten or untighten one to the general range you’re looking for. Presto, you have your primary sound. Begin to hum that pitch to yourself and…
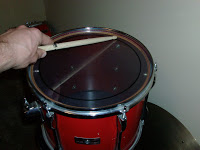
Step 3: Go to the lug directly across the drum from that primary lug and tap . Tighten or untighten until it sounds similar to the primary. This should take about 5-10 seconds. We’re not trying for studio quality here…MOVE IT!!!
Step 4: Next, go clockwise or counter clockwise (we don’t have time to worry about directions…just pick one!) and repeat steps 2 and 3. Once you’ve chosen a direction, stick with it until you’ve tuned all of the lugs to the sound of the primary lug.
Step 5: Hum the tone of your primary lug to yourself while you flip the drum over and set the other head on the throne or your knee for muffling. Repeat steps 1-4 and then move onto the next drum.
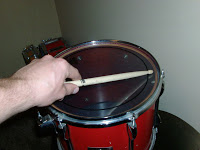
The goal is to get all of the lugs sounding within the same sonic range on one head. If all of the lugs are tightened to a similar sound, you’ll end up with an acceptable sounding drum…it won’t be your ideal sound, but it will at least sound like a drum…a tuned drum. If you're getting a weird overtone you can't get rid of, slap a small piece of gaff tape or a moon gel on the drum and roll with it.
This works even with loud music blaring, just get your ear super close to the drum and hum loudly. I’ve tuned a drum in less than a minute using this method. Would I use this to prepare my drums for a studio session? Absolutely not!!! But under the circumstances you need to sound professional, and this is a sure fire way to do that.
Now hurry up and count the band off, times up…
-Stephen Taylor
No comments:
Post a Comment